User & Location/Group Management
User Management
Note
These are instructions for creating and managing other users’s accounts. These options will only be available to a Customer Admin, typically the jobber or account administrator. For instructions on managing your own account, see User Settings

Pressing + New will allow you to create a new user account.
Search Users - Search users by name or email address
Group Filter - Filter users by Group assignment
Role Filter - Filter users by Role (Customer Admin or Customer Operator)
Users - Shows the users that fit the filters (if any) above. Pressing the  icon next to a user will give you additional options:
Reset Password - Sends a Password Reset email to the user’s email address

Edit - Allows you to edit the name, email address, phone number, and other details of the user’s account

Block User - Disables the user’s account, preventing future access. This will keep any associated user logs for future reference.

Delete User - Permanently deletes all record of the user account in question including any associated logs
Note
It is recommended to use the Block User function instead of Delete User to retain logs.
New/Edit User Screen
The Edit User and Add New User screens are identical apart from the Edit User screen pre-populating with the user information of the user you are editing.

The Name, Email Address, and phone number (optional) of the user you are creating/editing an account for. The email address must be a valid email address for the user to log in. Phone number is required for SMS (text) message alerts.

The Role of the user in question. A Customer Admin has access to ALL locations under your customer account, and can create and edit other users. A Customer Operator cannot create/edit users and only has access to the Location or Group you assign below
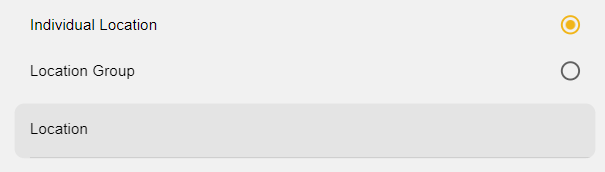
The Location(s) the user in question will have access to. You can either specify an individual location to grant access, or if a user should have access to multiple Locations, a Location Group that you have set up with those locations.
Location/Group Management

You can navigate between Manage Locations and Manage Groups using the tabs on the top of the screen.
Manage Locations
The Manage Locations screen displays all of the locations your user account has access to. For Customer Admins, this will be all locations under your Customer Account.

Search - Search locations by name/address
Group Filter - Filter locations by groups
Locations - Shows the locations that fit the filters above. Pressing the location will take you to that location’s Dashboard. Pressing the icon will allow you to Edit the display name of the location. To change the address of the location, please contact Everbrite.
Manage Groups
Groups allow you to create an organizational structure for your Locations. This can be used for organizational reasons, however the primary use for Groups is to allow individual Users to have access to multiple Locations. For example, if multiple Locations share the same manager or owner, a Group can be created with those Locations assigned which can then be assigned to the User.

Search - Search Groups by name/address
Locations - Shows the Groups that fit the filters (if any) above.
Adding Groups

Group Name - Enter the display name desired for the group
Filter Locations - Allows you to search by name or address for locations displayed
Available Locations - Shows the locations that fit the filters above. Check any locations you want to assign to the group.